
I get some version of this question almost every week: “Do I really have to keep a sourdough starter alive for a week before I can bake anything?” And for years, my honest answer was yes. Traditional sourdough starters, made from just flour and water, can take five to seven days to become active, and even then, some batches never quite get there. It used to frustrate me, especially back when I was still learning.
Then I started experimenting with kefir, which I already had bubbling away on my counter for smoothies and pancakes. It turns out milk kefir already contains a strong, active culture of wild yeast and beneficial bacteria, the same organisms you’re trying to coax out of thin air with a traditional starter. Using kefir instead of plain water cuts that waiting time down dramatically and, in my experience, gives a far more reliable result, especially for beginners who’ve struggled with a starter before. This guide walks you through exactly how I do it, from the very first mix to your first loaf.
What Is a Kefir Sourdough Starter?
A kefir sourdough starter is a mixture of flour and milk kefir that’s left to ferment until it becomes bubbly, active, and capable of leavening bread. It works on the same basic principle as a traditional sourdough starter, wild yeast and lactic acid bacteria feeding on the sugars in flour, producing carbon dioxide bubbles that make bread rise but it gets a significant head start because kefir already contains a mature, diverse culture of yeast and bacteria.
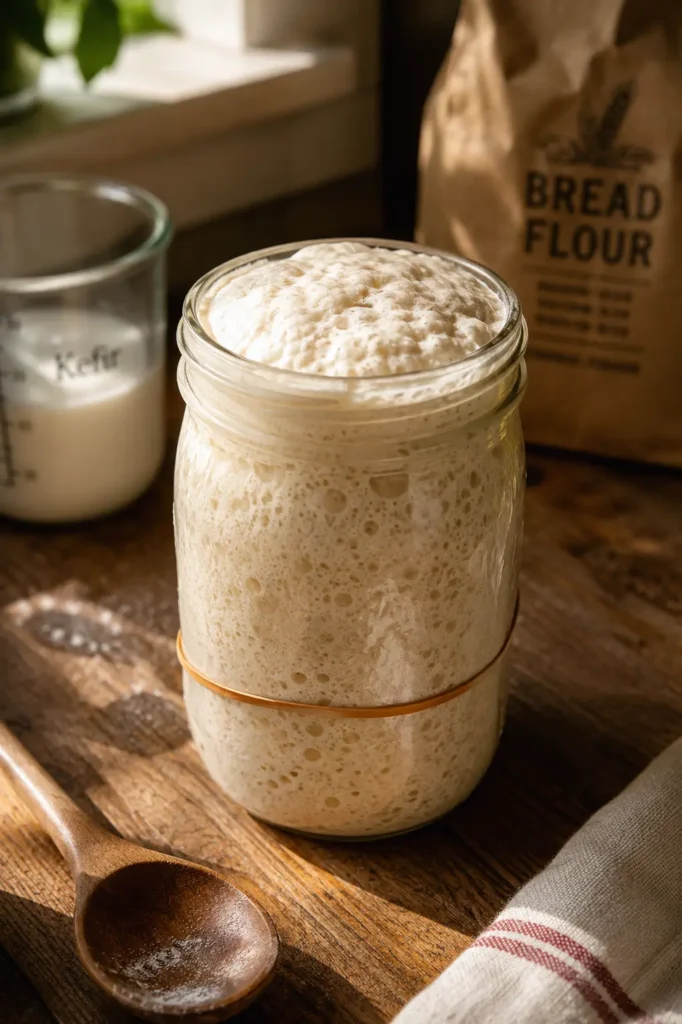
Traditional starters rely on capturing wild yeast from the air and the flour itself, which is a slow and somewhat unpredictable process. A kefir starter skips most of that uncertainty because the microorganisms are already present and active in the kefir before you even add the flour.
Why Use Kefir Instead of Plain Water and Flour?
- Speed. A traditional starter can take 5 to 7 days (sometimes longer) to become reliably active. A kefir starter is typically ready in 2 to 3 days.
- Reliability. Kefir’s established culture of yeast and bacteria tends to produce more consistent results than waiting for wild yeast to appear on its own, which can vary a lot depending on your kitchen environment.
- Flavor. Kefir starters often produce a slightly different flavor profile than water-based starters, a little tangier, sometimes described as having a subtle “cheesy” or complex note, which many bakers enjoy.
- You may already have it on hand. If you already keep milk kefir in your fridge for smoothies or drinking, you have a head start on your next sourdough starter without buying anything new.
- Digestibility. Like traditional sourdough, bread made with a kefir starter goes through a fermentation process that can make it easier to digest for some people, along with the added benefit of kefir’s own probiotic content.
Basic Equipment You’ll Need
- A clean glass jar: (a quart-sized mason jar works well)
- A kitchen scale or measuring cups: for consistent ratios
- A breathable cover: a coffee filter, paper towel, or clean cloth secured with a rubber band
- A rubber band or piece of tape: to mark the starter’s level so you can track its rise
Kefir Sourdough Starter (3-Day Method)
Equipment
- A clean glass jar (a quart-sized mason jar works well)
- A kitchen scale or measuring cups for consistent ratios
- A breathable cover a coffee filter, paper towel, or clean cloth secured with a rubber band
- A rubber band or piece of tape to mark the starter's level so you can track its rise
Materials
- 1 cup plain whole milk kefir (day 1)
- 1 cup bread flour (day 1)
- 1/2 cup plain whole milk kefir (day 2)
- 1/2 cup bread flour (day 2)
- 1/4 cup plain whole milk kefir (day 3)
- 1/4 cup bread flour (day 3)
Instructions
- Day 1: Combine kefir and flour: In a clean glass jar, mix 1 cups cup plain whole milk kefir (day 1) and 1 cups cup bread flour (day 1) until no dry flour remains. Cover loosely with a breathable lid, like a coffee filter secured with a rubber band. Leave at room temperature for 24 hours.
- Day 2: First feeding: You should see a few small bubbles forming. Add 1/2 cups cup plain whole milk kefir (day 2) and 1/2 cups cup bread flour (day 2). Stir well, cover loosely again, and leave for another 24 hours.
- Day 3: Second feeding: The starter should look noticeably bubblier and smell tangy. Add 1/4 cups cup plain whole milk kefir (day 3) and 1/4 cups cup bread flour (day 3). Stir well, cover, and leave for 6 to 8 hours.
- Day 3: Check for readiness: After 6 to 8 hours, your starter should have risen slightly and be full of bubbles with a pleasant sour smell. It is now ready to use in any sourdough recipe that calls for active starter.
Notes
The 3-Day Kefir Sourdough Starter Method
(See the interactive process card above, this outlines the exact schedule.)
This method uses a simple declining ratio of kefir and flour over three days. Here’s why each stage matters:
Day 1: The First Mix
Combining equal parts kefir and flour introduces the kefir’s existing culture to a fresh food source. You likely won’t see dramatic activity yet, a few small bubbles are a good sign, but don’t worry if it looks fairly quiet. The real activity is happening at a microscopic level.
Day 2: The First Feeding
By now, the mixture should show more visible bubbles and a noticeably tangy smell. Adding more kefir and flour “feeds” the growing culture, giving it fresh sugars to consume and encouraging it to multiply.
Day 3: The Second Feeding and Final Rise
This is usually the turning point. The starter should look actively bubbly, may have started to rise slightly on its own, and will smell distinctly sour. After this final feeding, it typically only takes 6 to 8 hours before the starter has roughly doubled and is ready to bake with.
How to Tell If Your Starter Is Ready
Your kefir sourdough starter is ready to use when it meets all three of these signs:
- It has visibly risen: often close to doubling in size after a feeding.
- It’s full of bubbles, both on the surface and throughout when you look at it from the side of the jar.
- It passes the float test: drop a small spoonful into a glass of water. If it floats, it’s active enough to use.
If your starter meets these signs earlier or later than the 3-day timeline, that’s normal. Kitchen temperature has a big effect on fermentation speed, warmer kitchens speed things up, cooler kitchens slow things down.
How to Maintain Your Kefir Starter
Once your starter is active, you have two options:
Use it all at once. Many bakers, myself included, simply use the entire batch for one recipe and start a fresh one the next time they want to bake. This works especially well if you don’t bake every week.
Keep it going. If you want to maintain an ongoing starter, feed it regularly with equal parts kefir and flour (by weight), either at room temperature every 24 hours, or in the fridge with a weekly feeding if you bake less often. Over time, you can also transition it to regular flour-and-water feedings if you’d rather not use kefir long term, though continuing with kefir tends to keep the culture especially active.
Troubleshooting Common Problems
My starter isn’t bubbling at all after Day 1. This is normal. Most of the activity happens after the Day 2 feeding. Give it time before assuming something is wrong.
My starter has a layer of dark liquid on top. This is called “hooch” and is a normal sign that your starter is hungry. Simply stir it in or pour it off, then feed as scheduled.
My starter smells like acetone or nail polish remover. This usually means it’s very hungry and needs a feeding sooner than scheduled. Feed it and it should return to a more pleasant, tangy smell.
I see pink, orange, or fuzzy spots. This indicates mold or harmful bacteria, and the starter should be discarded and restarted. This is more common when non-plain, flavored, or sweetened kefir is used, or when the jar wasn’t clean to begin with.
My starter isn’t rising much even though it looks bubbly. Try a slightly warmer spot in your kitchen (around 75-80°F is ideal), and make sure you’re using plain bread flour, which has more protein and food for the culture than all-purpose flour in some cases.
How to Use Your Kefir Sourdough Starter
Once your starter is active, you can use it exactly like you would a traditional sourdough starter in any recipe that calls for “active starter.” Here are all the kefir sourdough bread recipes on Kefir Guide where you can put your new starter to work:

9 Best Kefir Smoothie Recipes to Try This Week
Kefir Guide’s smoothie collection has grown into one of the biggest sections on this site, over 40+ premium recipes at…



- Sourdough Kefir Bread
- Blueberry Lemon Sourdough Bread
- Cinnamon Raisin Sourdough Bread
- Jalapeño Cheddar Kefir Sourdough Bread
- Chocolate Chip Kefir Sourdough Bread
- Cranberry Walnut Kefir Sourdough Bread
- Garlic Herb Kefir Sourdough Bread
- Everything Bagel Kefir Sourdough Bread
- Honey Oat Kefir Sourdough Bread
- Sun-Dried Tomato Basil Kefir Sourdough Bread
You may also want to read our guide on What Is Kefir? to understand more about the health benefits and science behind the culture powering your new starter.
Frequently Asked Questions
Can I use flavored or sweetened kefir for this?
No. Always use plain, unsweetened kefir. Added sugars and flavors can interfere with fermentation and increase the risk of mold.
How is a kefir starter different from a traditional water-based starter?
A kefir starter uses kefir’s already-active culture of yeast and bacteria, which typically becomes ready to bake with in 2 to 3 days rather than the 5 to 7 days (or longer) a traditional flour-and-water starter can take.
Can I use water kefir instead of milk kefir?
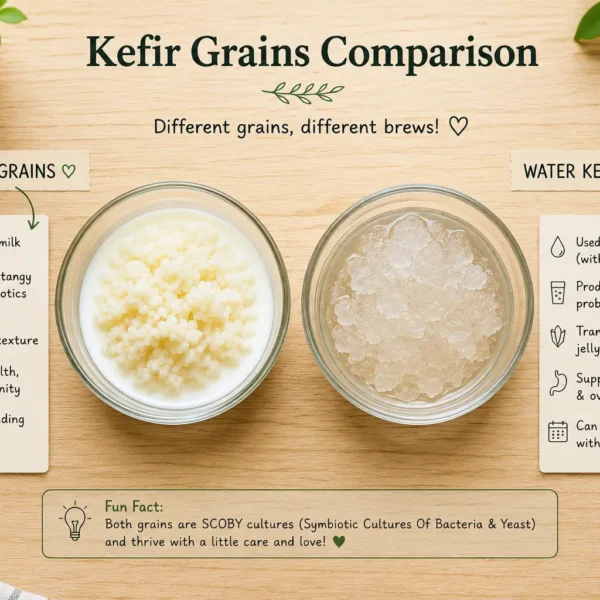
Some bakers have had success with water kefir, though milk kefir is more commonly used and tends to produce more consistent results, since it contains a slightly different and often more robust culture.
Does bread made with a kefir starter taste different from regular sourdough?
It can have a slightly different flavor profile, often described as a bit tangier or more complex than a water-based starter, though the difference is subtle once baked into bread.
Can I convert my kefir starter into a regular flour-and-water starter later?
Yes. Once established, you can gradually switch to feeding it with just flour and water instead of kefir, and it will continue functioning as a normal sourdough starter.
Why did my starter stop bubbling after a few days?
This usually means it’s hungry and needs feeding, or the room has gotten too cold. Feed it and move it somewhere slightly warmer, and it should become active again within a few hours.
Do I need to discard part of the starter like a traditional sourdough starter?
For this initial 3-day method, no discarding is needed. If you choose to maintain an ongoing starter afterward, occasional discarding before feeding helps keep the volume manageable.

Hi, I’m Natalia Smith, a kefir enthusiast and content writer dedicated to making fermented dairy approachable and enjoyable. My journey with kefir began in my own kitchen, experimenting with recipes and sharing the health benefits I discovered. Through hands-on experience and continuous learning, I aim to provide clear, trustworthy information that helps others embrace the goodness of kefir in their daily lives.
Thank for sharing this amazing method. Appreciated 👍
I’ve been making regular sourdough for a while, but I never thought about using kefir to start it. Your step-by-step guide made the whole process easy to understand. I’m definitely trying this method this weekend. Thanks for sharing such a detailed guide!